

When I think back to 2023, I will always remember it as the year I bought my dream boat. And also the year I repainted it. February 2023...
Dreaming In Sky Blue (Part Two)
Repairing Maui’s Sky Blue Topsides
When I wrote my original Dockwa article about repainting Maui’s topsides, I alluded that I’d never (voluntarily) do it again. One-and-done. Rite of passage, complete. Check it off the list and move on to other projects and more importantly, adventures under sail.

Maui and me in 2023, following a full DIY topside job.
Well, life (and gravity) had other plans. 
Maui is my Alberg 35’, a Carl Alberg design built in 1967 that I’ve been restoring for the last few years. She’s the boat I dream of taking on big cruises, and the canvas for a hundred small projects that keep me busy all year long. She’s also, as of last fall, the boat that hit the pavement during haul out. Yes, pavement. The kind of accident that makes every boater’s stomach drop just thinking about it.
Sitting there breached on her port side, all I could think about was all the work I’d poured into her over the years... and perhaps most of all, the paint job I had so proudly completed just two seasons earlier.
Making It Work
After months of insurance back-and-forth (because let’s be real, the “book value” of a 1960s boat doesn’t reflect the heart, sweat, and dollars you’ve put into it), I finally settled on the appraised payout and decided to make it work. Many friends and family members told me to take the money and walk away, but the idea of Maui literally getting chopped up and hauled off to a junkyard was impossible to stomach. I love this boat too much. And the damage wasn't that bad!
 Hullside damage following the 2024 accident. Could be worse!
The good news? After plenty of detective work, we confirmed the aside from cosmetics, the hull was structurally sound (wooo!). Solid fiberglass builds from the 60s certainly have their perks… strong bones, no doubt about it. A skilled boatyard in Harpswell, Maine is taking care of other structural fixes, which is a huge relief. But stretching those insurance dollars means the cosmetic work is 100% on me. That perfect Sky Blue paint job from 2023? My responsibility to repair. Luckily, at this point I am a seasoned Alexseal pro (if I do say so myself 😂), and my wonderful crew was ready and willing to trade free labor for pizza and beer to help bring Maui back.
Sky Blue 2.0
And so, here we are. It's the sequel to Dreaming In Sky Blue: Repainting My Boat’s Topsides. This time, it’s the repair edition. Just yesterday I wrapped up the final topcoat, so I thought I would reflect and share how I fixed the gouges on my hull to revive my perfect DIY paint job. Spoiler alert: she came back better than ever.
How It Went Down
The first step was facing the damage head-on. I called up an Alexseal rep, who kindly walked me through the repair process. Following his advice, I taped off the sections of hull that were damaged by the accident. This way I could contain the repair without starting from scratch across the entire boat (yay for small victories!).

Damaged area after first round of sanding prior to fairing.
Then came sanding. Ah yes, sanding… my old friend. The first time around, we logged hundreds of hours of power sanding. This time, I’m happy to say it was closer to thirty. Still a commitment, but a much more manageable one. We worked our way from 80 grit up to 320, slowly erasing the scars until the hull returned to smooth.
The deeper gouges did called for some fairing compound. I used 3M marine filler (MVP of this entire refit) and sanded those spots flat until the hull felt smooth to the touch with a bare hand. It was dusty, repetitive work, but the kind of work you know has to be done with patience if you want it to all be worth it in the end!

A look at the damaged area post fairing. Along with the main hullside repair, the anchor hit the bow on impact for another small repair. We also used this opportunity to fill some old screw holes and refinish the rubrail, which was added to the boat prior to my ownership.
Primer Time
Once the surface was faired and smooth, I scrubbed it down with Dawn dish soap and water (advice I picked up the first time I worked with Alexseal: acetone isn’t your friend before this particular paint application). Then came primer time (!): two thin coats over two days, mixed carefully and applied quickly before the chemical clock ran out. Just like that, the hull was smooth again. For more on Alexseal mixing ratio's and applications, revisit my original article.

Refinishing the main hullside damage and rubrail. Two coats of primer and one coat of topcoat before blending the repair.
With the primer cured, I sanded the repair spots again with 320 grit, gave the surface a final clean, and rolled on a single topcoat of Maui Blue over the damaged areas. Finally! A blue boat again! Unfortunately, that was also the last step that could stay “localized” to those small sections.
The Big Blend
To really blend the finish, you can’t just patch, you have to sand and paint the entire hull as a final step. So that’s what we did: another full lap with 320 grit, smoothing every inch until the seams of the repairs leveled into the original Sky Blue. The goal was to scuff up the whole boat without burning through too much topcoat, while carefully fairing out the repair lines.

Jack sanding his section of Maui prior to the final topcoat.
Thankfully, I managed to recruit some extra free labor for this step, shoutout to Cloud, Alex, Jack, and Hayden!!! Some friend groups gather for dinner, BYOB, mine shows up for boatyard, BYOS (Bring Your Own Sander). With five of us tackling the hull, we had the whole thing fully prepped and cleaned in half a day at the yard. Ahh, how I love boat life.
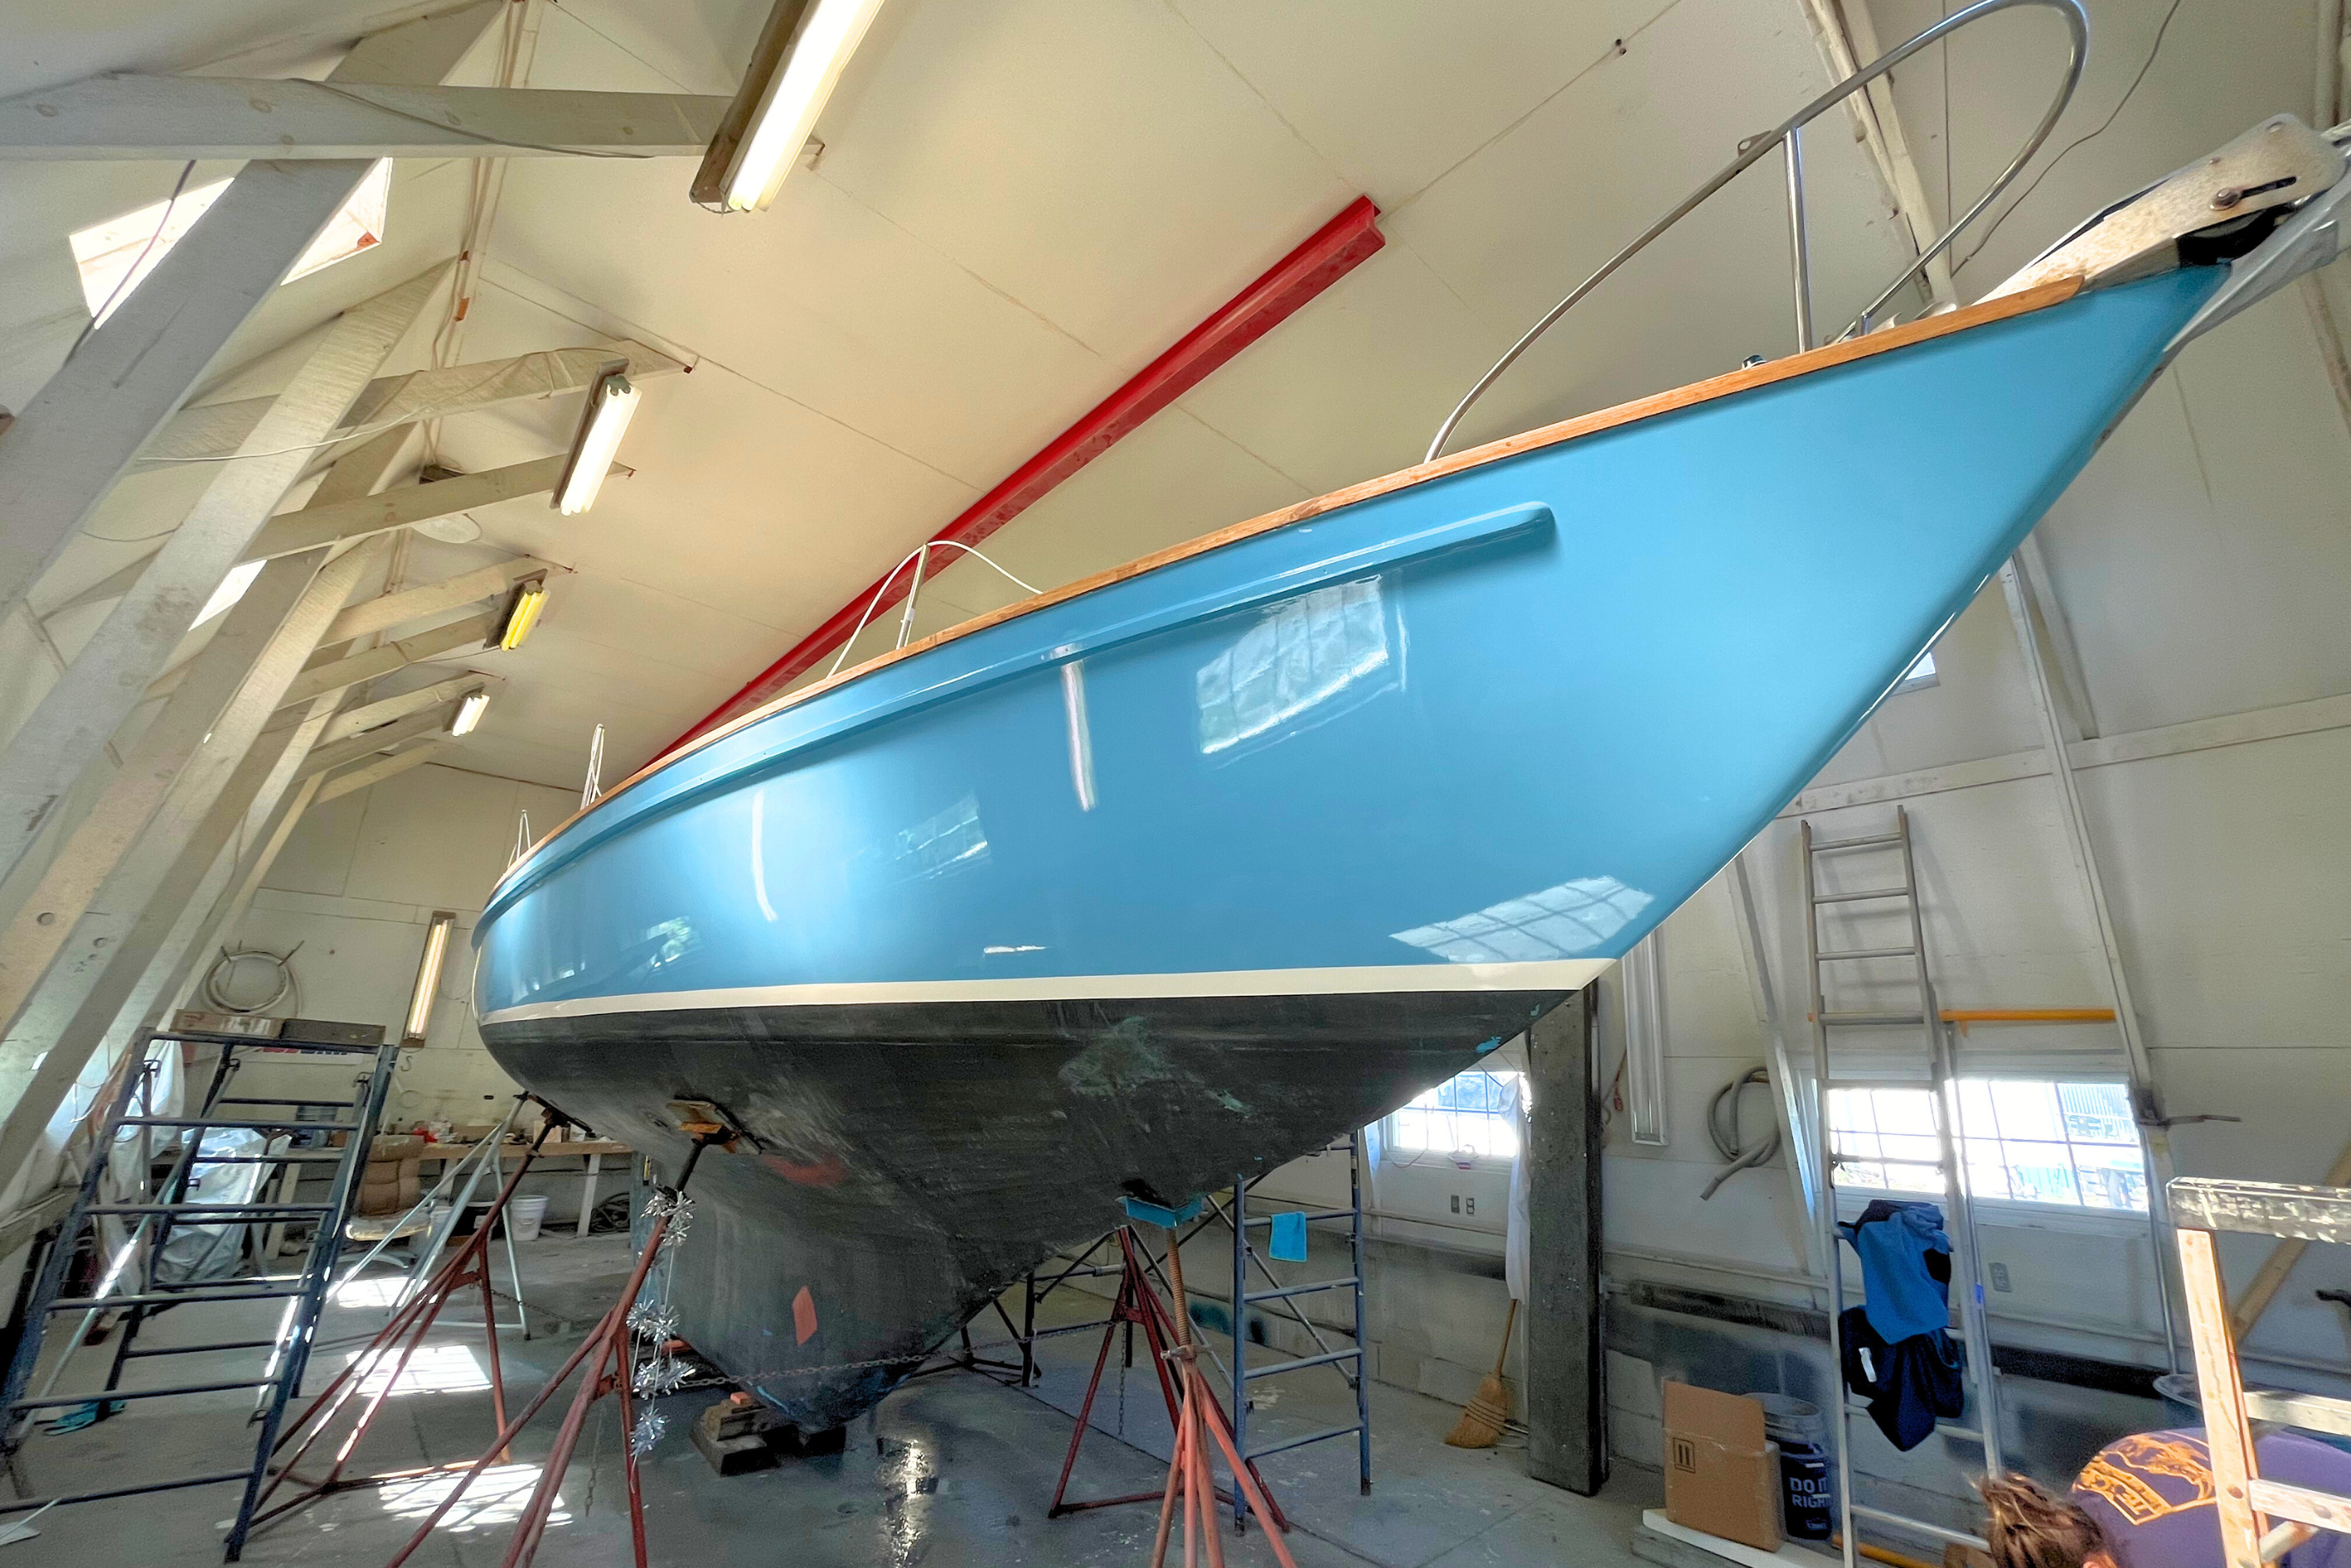
Back to Blue!
After all the prep, the final step felt almost second nature. Just yesterday, Jack and I rallied to the yard, washed, taped, and rolled on one last Sky Blue topcoat across the entire hull. We used the same technique as before (outlined in my original article), and implemented a few tricks we’ve picked up along the way. Its all about teamwork with this application, and we nailed it. Just like that, Maui’s lines came together again... and for the first time since the accident, she looked like herself. *Exhale*
 Maui is back! She was looking better than ever as the fresh topcoat settled and started to cure.
Quick Guide: Repairing a Topside Paint Job
Let's break it all down, shall we? If you’re staring down your own scratched, gouged, or dinged topsides, here’s the simple version of the process I followed:
- Tape off the damaged area. Keep repairs contained until step 8.
- Sand down the damage. Depending on the damage, start coarse (I started at 80 grit) and work up to fine (320 grit).
- Fair the gouges. Apply fairing compound to low spots, let cure, sand smooth to touch.
- Wash the surface. Mix Dawn dishsoap + water in a bucket and clean areas with a big sponge before every new coat of paint. Rinse with a hose. Let dry, and wipe down with a tack cloth right before painting to capture any extra dust.
- Spot prime. Apply two thin coats of Alexseal primer to the taped off repair zone(s). Let paint dry between coats as instructed.
- Sand the primer. Sand spot-primmed areas (I used 320 grit), just enough to smooth out imperfections. Repeat step 4.
- Apply a first topcoat to the damaged area. One coat over the damaged area. Let the paint cure! A little goes a long way with Alexseal. Apply lightly.
- Sand the whole hull. Yes, all of it! For a seamless blend of repairs, and a scuffed surface for a fresh coat to adhere to.
- Roll on a fresh topcoat. Tape and apply one full topcoat to unify everything.

Focused applying the final topcoat. Alexseal has a rolling additive that helps the paint flatten, so you roll, but don't have to tip.
A Labor of Love
By the time I stepped back from the last coat, Maui’s Sky Blue topsides looked better than ever. And there it was, that same satisfaction and pride I got from the first time around. The hullside scars of last fall completely gone, replaced by a glossy finish that make all the long hours worth it.
Old-boat ownership is a constant reminder that you don’t just buy a boat, you inherit every project, every past repair, every curveball. You lose time, you sweat through weekends (in this case, a whole sailing season in Maine), and you redo jobs you swore you’d never do again. But at the end of it, you gain something more valuable than a perfect paint job: a boat that carries the mark of your effort, your persistence, and your care. It truly is the labor of love.

Step 9: Repaint the whole boat!
Maui isn’t perfect. She never will be. But she’s strong and she’s mine. She’s given me the best memories of my whole life, and I can’t wait to see the new horizons she brings me next season (with those topsides shining brighter than ever!)
For more tips on painting with Alexseal, check out my original article Dreaming In Sky Blue: Repainting My Boat’s Topsides. And if you have any questions, feel free to email me at lauren.topchik@dockwa.com.
Follow along with Maui and me: @SailingCita

